Instructions to repair PVC products for watersports.
Suitable types of adhesives for repairing PVC products.
Many adhesives for plasticized PVC are available on the EU market. It is necessary to choose a suitable adhesive which should have these properties:
– colorless and transparent
– flexible after drying to cooperate with the inflation and stretching of the material
– resistant to UV radiation and chlorinated water
– non-toxic, suitable for swimming pools for people
– no bubbles after drying (in some glues, bubbles form when drying)
In addition to special adhesives for plasticized PVC, polyurethane adhesives, such as those used for footwear, can also be be used. Adhesives designed for repairing neoprenes are also suitable.
It is important to read the instructions on the adhesives! Some polyurethane adhesives take longer to cure. About 24 to 48 hours.
All plasticized PVC and polyurethane based adhesives are used as contact adhesives and require patching.
Preparation of the workplace.
Find a smooth hard surface to lay product on, to complete the repair and clean off the surface to ensure there are no sharp abrasive items which could damage the tube. You will also need to find a flat heavy object or a board larger then the patch and a weight.
Make sure there is no water or moisture near or around the damaged area. If moisture exists around the damaged area dry it by using paper towels, a hair dryer, or just leave outside in the sun until dry.
Preparation of the damaged product.
Deflate product about 90% so you are able to lay the material flat. Be careful not to slide the material around on the ground because this could cause more damage. Smooth out the material onto the surface so that the top and bottom of the material lye smoothly on top of each other.
Clean around the damaged area with rubbing alcohol or Acetone. If the hole is on or near any screen printing (Logo, Warning Panel, etc.), use rubbing alcohol only and do not use Acetone. Acetone will active and smear the ink. Also clean the patch material you will be using the same as above.
Preparation of the patch.
Cut a circular patch (or oval shape if the hole is elongated) from the repair material that will be at least 2-3 cm larger than the hole all the way around the damaged area. Make sure to cut the patch in a circular shape with no sharp edges. This will ensure the best performance from the repair patch.
Your patch material will have a shiny side and a dull side. Lay the patch on top of the hole with the shiny side facing down covering the damaged area. This is important because the shiny side of the patch does not have UV protection.
Work procedure.
Trace around the patch on the tube. For the best cosmetic results, use a type of marker that is as close in color as you can.
Observe the size of the hole. If the hole is larger that and 2-3 cm, you may want to slide a small piece of paper towel inside the hole ensuring the paper towel inside is flat and covering the open hole area. This will prevent the two pieces of material from gluing together.
Applying the glue.
Apply a smooth thin coat of glue to both the circular marked area on the tube and the shiny side of the patch material. Make sure to spread the glue just a small amount further than the line you traced ensure all edges will be securely glued. Also make sure you apply a smooth thin coat to the entire shiny side of the patch material including all edges.
Drying the glue.
Allow glue to set for a few minutes until it becomes slightly tacky. Under normal circumstances, this should take approximately 3 to 6 minutes. Please keep in mind that temperature will affect the time. The cooler it is, the longer it will take.
Applying the patch.
Gently apply the patch material over the hole (Make sure it is lined up with the line you traced on the tube) by slightly bending the material to have the center of your patch touching the center of the hole first and gently lay to patch down working from center outwards to the edges of the patch. Use your finger tips and slowly rub from the center outwards trying to rub out any possible air bubbles trapped under the patch.
Use smooth plastic tool and rub the patch firmly to the tube also starting at the center and working your way outward. If you happen to have some excess glue bleed out the edge of the patch, you can remove by using your finger nail or a plastic knife.
Applying a load to the patched area.
Place the heavy object over the top of the entire patch and let stand for 24 hours. Make sure the heavy object you use has no sharp edges.
Time required for the glue to dry.
Finally, remove the heavy object and feel all around the edges of the patch with your fingers to ensure all edges have been completely sealed. If you find a small area not completely sealed, carefully slide some glue inside the opening with small applicator such as a cotton tip applicator or tooth pick. Let dry for a minute or two and firmly rub down with your plastic applicator. Place the heavy object over the top of the entire patch again and let stand for 24 hours.
Testing the tightness.
After the glue with the patch has dried, it is necessary to test the tightness and quality of the bonding. The product must be inflated with the prescribed pressure. One option is to immerse the bonded area in water and observe whether air is leaking from the bonded area or whether bubbles are forming in the repaired area. Another way to check the tightness of the bonded area is to apply water with detergent using a sponge. If air is leaking from the bonded area, bubbles will form in the patch area.
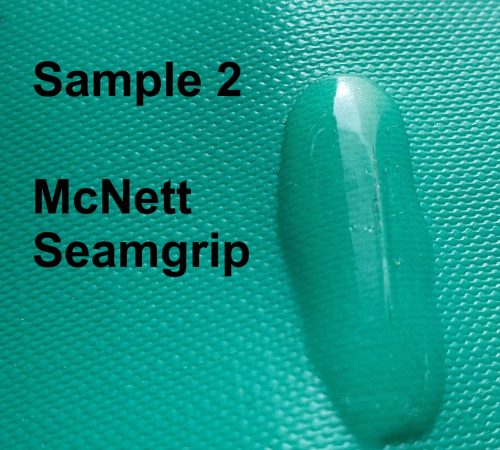
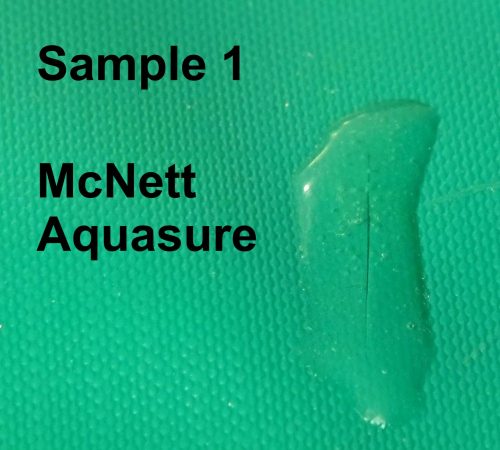
We have very good experience using a special adhesives that forms a self-supporting patch: McNett Seamgrip, Aquasure + FD, McNett Aquasure.
When using these types of adhesives, the product may look like this after repair:

After curing, the product was left with a self-supporting, transparent, and flexible patch. The patch is practically invisible and does not spoil the appearance of the product.

